
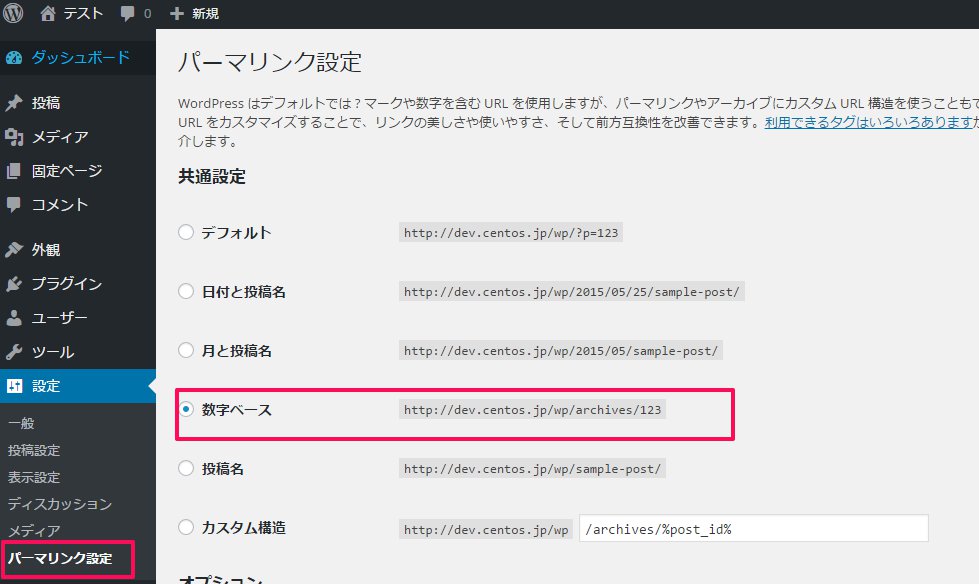
パーマリンクの設定
管理画面の「設定」→「パーマリンク設定」からデフォルトから「数字ベース」に変更します。
インストールディレクトリに.htaccessのファイルが作成されます。
ファイルが作成されないときはhttpd.confの設定かインストールディレクトリのオーナーを確認してください。
cat /var/www/html/dev.centos.jp/wp/.htaccess
# BEGIN WordPress

RewriteEngine On
RewriteBase /wp/
RewriteRule ^index\.php$ - [L]
RewriteCond %{REQUEST_FILENAME} !-f
RewriteCond %{REQUEST_FILENAME} !-d
RewriteRule . /wp/index.php [L]


# END WordPress
サイトアドレスの変更
/var/www/html/dev.centos.jp/wp/index.phpと.httaccessを/var/www/html/dev.centos.jp/にコピーします。
/var/www/html/dev.centos.jp/wp/
cp index.php ../index.php
cp .htaccess ../.htaccess
コピーしたファイルを編集します。
/** 17行目にwpを追加 */
require( dirname( __FILE__ ) . '/wp-blog-header.php' );
↓
require( dirname( __FILE__ ) . '/wp/wp-blog-header.php' );
# BEGIN WordPress
#RewriteBase とRewriteRule の行のwpを削除

RewriteEngine On
RewriteBase /
RewriteRule ^index\.php$ - [L]
RewriteCond %{REQUEST_FILENAME} !-f
RewriteCond %{REQUEST_FILENAME} !-d
RewriteRule . /index.php [L]


# END WordPress
管理画面の「設定」→「一般」からサイトアドレスを変更します。
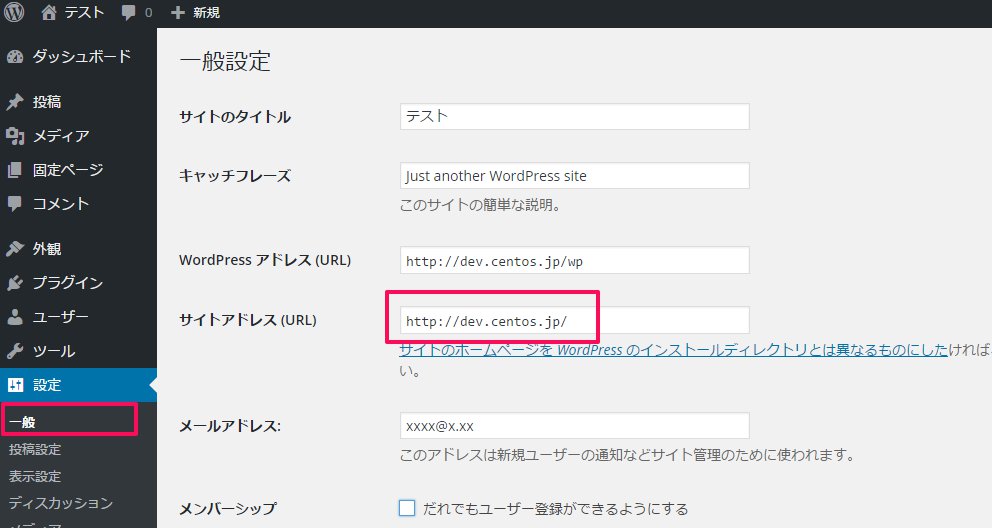
http://dev.centos.jp/
のURLでローカル環境のバーチャルホストのワードプレスにアクセスできるようになりました。
スポンサーリンク